Understanding the Color Measurement Process: A Comprehensive Guide
Color is a critical attribute in nearly every industry, from textiles and automotive manufacturing to food production and printing. Consistency in color ensures product quality, brand recognition, and customer satisfaction. The color measurement process is the scientific method used to quantify color objectively, transforming subjective visual perception into actionable numerical data. This guide breaks down the process, key concepts, tools, and best practices to master color measurement.
1. Why Color Measurement Matters
Color is inherently subjective—what one person perceives as “navy blue” another might call “indigo.” This subjectivity creates challenges in:
- Quality control: Ensuring batches of products (e.g., paint, fabric, or candy) match a target color.
- Cross-industry communication: Enabling designers, manufacturers, and suppliers to agree on color specifications.
- Regulatory compliance: Meeting standards for product safety (e.g., color changes indicating spoilage in food) or brand guidelines (e.g., Coca-Cola’s signature red).
Color measurement eliminates ambiguity by assigning numerical values to color, making consistency and communication possible.
2. Key Concepts in Color Measurement
Before diving into the process, it’s essential to understand foundational terms and principles that underpin color measurement.
a. Color Perception vs. Color Measurement
- Human perception: Dependent on light, the eye’s photoreceptors, and brain interpretation. It’s subjective and varies between individuals.
- Objective measurement: Uses instruments to quantify color via light absorption, reflection, or transmission, producing numerical data (e.g., LAB values) that are consistent across devices and observers.
b. Color Spaces: The “Language” of Color
A color space is a mathematical model that defines colors using numerical coordinates. It translates light properties into values that describe hue, saturation, and brightness. Key color spaces used in measurement include:
- CIELAB (LAB): A device-independent space (based on human vision) with coordinates L(lightness), a (green-red), and b (blue-yellow). It’s the global standard for color measurement due to its perceptual uniformity.
- CIELCH: Derived from LAB, it uses L(lightness), C (chroma/saturation), and h (hue), making it intuitive for describing color in terms of shade and intensity.
- RGB/CMYK: Device-dependent spaces (tied to screens or printers) used for reproduction but less reliable for measurement due to hardware limitations.
LAB is the most widely used in measurement because it’s universal and aligns with how humans see color.
*c. Color Difference (ΔE)**
Color measurement often focuses on comparing a sample to a “standard” (target color). The color difference (denoted as ΔE*, or “delta E”) quantifies how much two colors differ numerically. A lower ΔE* indicates closer similarity:
- ΔE* < 1: Barely perceptible to the human eye.
- ΔE* = 1–3: Noticeable only to trained observers.
- ΔE* > 5: Obvious difference to most people.
ΔE* is calculated using LAB values (ΔE* = √[(ΔL*)² + (Δa*)² + (Δb*)²]), making it a critical metric for quality control.
 d. Illuminants and Observers
Color appearance depends on the light source (illuminant) and the human eye (observer). To standardize measurements, the International Commission on Illumination (CIE) defined:
Standard illuminants: Simulate common lighting conditions, e.g.,
- D65: Daylight (6500K, used for most outdoor/indoor natural light applications).
- A: Incandescent/tungsten light (2856K, typical of warm indoor lighting).
- F2: Fluorescent light (4200K, common in offices).
Standard observers: Model average human color perception:
- 2° observer: Simulates the foveal vision (central 2° of the eye), used for small samples.
- 10° observer: Simulates a wider field of view, used for larger samples.
Measurements must specify the illuminant and observer (e.g., “CIE LAB, D65/10°”) to ensure consistency.
3. Instruments for Color Measurement
Color measurement relies on specialized tools to capture and analyze light reflected, transmitted, or emitted by a sample. The two primary types are spectrophotometers and colorimeters.
a. Spectrophotometers
Spectrophotometers measure the full spectrum of light (wavelengths from ~380nm to 730nm, visible to the human eye) reflected or transmitted by a sample. They calculate color values (e.g., LAB) by analyzing how the sample absorbs or reflects each wavelength.
Types:
- Benchtop: High precision, used in labs for critical measurements (e.g., pharmaceutical quality control).
- Portable/handheld: Compact, for on-site testing (e.g., checking paint on a car assembly line).
- In-line: Integrated into production lines for real-time monitoring (e.g., measuring color of paper as it’s manufactured)
Advantages: Accurate across a wide range of colors and materials; accounts for metamerism (when two colors match under one light but not another).
b. Colorimeters
Colorimeters use filters to measure light in three broad wavelength ranges (mimicking human eye cones for red, green, blue). They directly output color values (e.g., LAB or RGB) but lack spectral data.
- Advantages: Lower cost, simpler operation, ideal for routine quality control in industries like food or cosmetics.
- Limitations: Less accurate for complex colors or metameric samples; limited to specific color spaces.
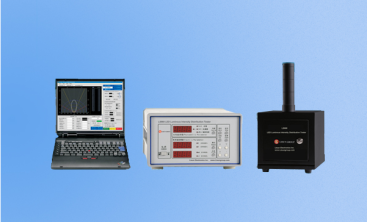
What is a Spectroradiometer?
A spectroradiometer is a device that can measure wavelengths, irradiance, flux, and energy of a light source. This advanced optical instrument can measure the spectral power distribution of different light sources by capturing their intensity and wavelength composition.
Due to its ability to measure the quality of light sources, the commercial use of spectroradiometers has a broad range of applications, ranging from agriculture to astronomy. They are also used for UV, NIR, or VIS scans.
4. The Step-by-Step Color Measurement Process
The color measurement process follows a structured workflow to ensure accuracy and reproducibility.
Step 1: Define Objectives and Standards
- Identify the target color: Establish a “standard” (e.g., a physical sample, a digital color specification, or a regulatory requirement).
- Choose metrics: Decide which color space (e.g., LAB) and color difference (ΔE*) threshold (e.g., ΔE* ≤ 2) will define “acceptance.”
- Select illuminant/observer: Based on the sample’s end-use (e.g., D65 for outdoor products, A for indoor textiles).
Step 2: Prepare the Sample
Sample preparation is critical—inconsistent samples lead to unreliable data:
- Uniformity: Ensure the sample is homogeneous (e.g., no streaks in paint, consistent texture in fabric).
- Surface condition: Account for gloss, matte, or texture (use instruments with gloss-compensating features if needed).
- Size/shape: Match the instrument’s measurement area (e.g., a 4mm aperture requires a sample larger than 4mm).
- Handling: Avoid fingerprints, dust, or damage (use gloves or clean tools).
Step 3: Calibrate the Instrument
Calibration ensures the instrument outputs accurate data by correcting for drift or environmental changes.
- White calibration: Use a standard white tile (e.g., a certified BaSO₄ plate) to set the baseline for 100% reflectance.
- Black calibration: Use a black hole or zero-reflectance standard to set 0% reflectance.
- Verification: Check calibration with a control sample (a known color) to confirm accuracy.
- Frequency: Calibrate daily (or per manufacturer guidelines) and after large temperature/humidity changes.
Step 4: Perform the Measurement
- Positioning: Align the sample with the instrument’s aperture to avoid edge effects. For irregular shapes (e.g., curved plastic parts), use a fixture.
- Number of readings: Take 3–5 measurements across different areas of the sample to account for variability, then average the results.
- Measurement mode: Choose reflectance (for opaque samples like paper) or transmittance (for transparent samples like liquids or glass).
Step 5: Analyze the Data
- Convert to color values: The instrument outputs numerical data (e.g., L* = 70, a* = -5, b* = 20 for a pale green).
- Calculate color difference: Compare sample values to the standard using ΔE*. Example: If the standard has L* = 72, a* = -4, b* = 19, then ΔL* = -2, Δa* = -1, Δb* = 1, so ΔE* = √[(-2)² + (-1)² + (1)²] = √6 ≈ 2.45.
- Interpret results: Determine if the sample meets the acceptance threshold (e.g., ΔE* ≤ 2.45 may pass if the threshold is 3).
Step 6: Document and Act
- Record data: Log color values, ΔE*, instrument settings (illuminant/observer), sample details, and date/time.
- Take action: If the sample fails, adjust production (e.g., tweak dye concentrations in textiles) or investigate root causes (e.g., inconsistent raw materials).
5. Factors Affecting Color Measurement Accuracy
Even with careful steps, several factors can skew results:
- Environmental conditions: Temperature, humidity, and ambient light (avoid direct sunlight or harsh lighting near the instrument).
- Sample variability: Inherent differences in materials (e.g., natural fibers like cotton may have subtle color variations).
- Instrument limitations: Older devices or mismatched apertures (e.g., using a 8mm aperture for a 5mm sample) reduce accuracy.
- Operator error: Poor calibration, inconsistent sample positioning, or mishandling (e.g., smudging the sample).
6. Applications Across Industries
Color measurement is integral to quality and consistency in diverse fields:
- Textiles/Fashion: Ensuring dye batches match design specifications; checking colorfastness (resistance to fading).
- Automotive: Verifying paint consistency across car parts (e.g., doors, fenders) and finishes (matte, metallic).
- Food/Beverages: Quantifying ripeness (e.g., banana yellow), freshness (e.g., meat redness), or uniformity (e.g., chocolate brown).
- Printing/Packaging: Matching ink colors to brand standards; ensuring labels or brochures print correctly.
- Pharmaceuticals: Detecting degradation (e.g., yellowing of pills) or ensuring uniform coating color.
7. Best Practices for Reliable Results
- Standardize procedures: Use written protocols for sample prep, calibration, and measurement.
- Train operators: Ensure staff understand instrument use, calibration, and data interpretation.
- Maintain instruments: Clean apertures, replace calibration standards time,and service devices per manufacturer guidelines.
- Validate with visual checks: While measurement is objective, cross-check with trained observers for critical applications.
Conclusion
The color measurement process transforms subjective color perception into objective data, enabling consistency, quality control, and clear communication across industries. By understanding key concepts (color spaces, ΔE*), using the right instruments, and following a structured workflow, organizations can ensure their products meet color standards—enhancing brand trust and customer satisfaction.
Color measurement is more than a technical step; it’s a bridge between design intent and real-world production, ensuring that what’s seen is what’s specified.